

How To Repair Rv Wall
You lot take spent a lot of money p urchasing your RV. Over the years you got a lot of good apply out of it. Now to continue to become keen apply, you lot demand to exercise a few repairs to make certain it remains in summit status.
How to Repair RV Shower Walls: RV shower walls are not one piece installs. You can remove one section and supplant it with a new unbroken piece of shower wall plastic. All you have to practise is remove the screws, use a knife to remove the caulking and loosen the moulding. Then replace the panel.
To achieve this, you may just need an hr of time. To find out more almost fixing your leaky, croaky or loose RV shower panels, just continue to read our review. It has the data you lot need to do nifty repair work to your cleaved RV shower.
Repairing RV Shower Walls 101
How to Remove RV Shower Wall
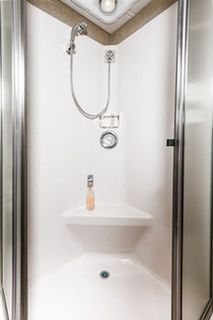
Removing an RV shower wall is non difficult work. It may be ho-hum to practice considering you accept lots of little things to tackle before sliding the walls out. Of course, not all RV shower walls are the same so you may need to adapt the information provided hither to fit your specific situation.
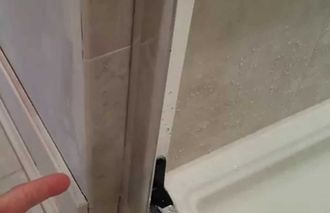
- The beginning step is to remove all the screws holding the broken section of your shower. These screws may exist both Allan and Phillips so have a diverseness of screwdrivers on hand
- Side by side, take a box cutter or sharp pocketknife and cut out all the caulking around the wall's edges
- Once the caulking is gone, the outside molding should just pull out of identify.
- Then you need to remove the inside moulding. These may be held into identify by two sided tape. You may need your knife to help cut the seal of the record as you remove these mouldings.
- Once the caulk, screws, and moulding are removed, the shower wall should sideslip out of its place without difficulty
- If done correct, you are looking at about xx to xxx minutes to remove the shower walls
RV Shower Wall Loose
Traveling down rough roads tin can accept its toll on your RV. One of the areas that feel the bumps the nigh will exist the walls of your shower. Since they are attached to a frame, those bumps and jolts and jostle the frame.
When this happens information technology is possible that your shower walls become loose. Your first instinct may be to grab a bottle of gum or a tube of silicone agglutinative. But that would not exist the best move to brand
The reason behind this thought is that both glue and silicone adhesive are vulnerable to the same bumps and jolts that knocked the original fasteners loose. After awhile, the glue or silicone adhesive will lose its seal and come loose again.
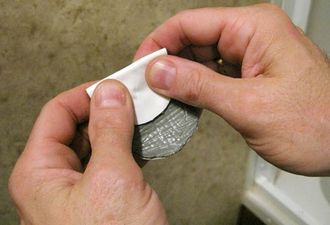
Another reason not to apply these adhesives is that certain areas of your shower are non caulked or glued to let the moisture out before it causes any damage to your RV parts. The correct fashion to tighten up your loose shower wall would be to use plastic rivets.
These plastic rivets practise a good job and they can exist plant in any home comeback store or RV parts department.
RV Shower Pulling Away from Wall
When you spot your shower walls pulling away from its frame, it is most likely that any glue or adhesive property the walls to the frame have lost their seal. This happens quite often peculiarly when Your RV travels downward some bumpy roads.
The quick fix for this is to purchase some plastic rivets and secure the shower walls without reusing whatever glue or other agglutinative. You lot desire to make sure you have a secure fit, without blocking the escape of any steam, etc. From your shower.
If yous block the moisture's escape routes, and then you will be creating a future issue you have to solve afterward on. Some other issue that causes this problem is a h2o leak. To fix this problem, y'all will need to detect the source of the water leak and patch it upward.
The leaks could come from the roof of your RV. That ways you would have to inspect all the seams on your RV's roof to see where at that place may an opening for h2o to enter into your vehicle.
RV Shower Leaking Behind Wall
If you are seeing leaking water in your shower or RV bathroom and your shower walls are not cracked. And then you have a serious problem that may have a few times to get fixed correctly.
Part of the repair problem is how your RV'due south bathroom was put together. If the shower walls were put on showtime, then the other cabinets and fixtures, then y'all have to remove a lot of items before yous can remove the shower walls to find the leak.
The source of this type of leak about probable originates in your fixture connections or the different h2o connections backside your shower walls. If it is a urban center connection that is loose, and then you have to remove the walls to fix it.
Other places that might leak h2o are the shower joints, loose water pipe connections and a lot more. Information technology may take some time to notice the source of the h2o leak but while yous have the shower walls off, look for additional leaks or loose connections and tighten them upward.
Do not worry if you do non get the h2o leak the outset time out. Some dealers accept stock-still the same leaks twice and notwithstanding did not get the task done. Water leaks are always tricky.
RV Shower Wall Leak
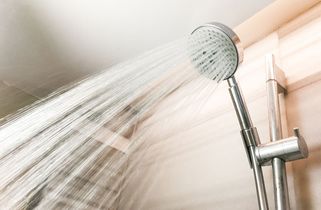
The get-go thing to do when information technology comes to whatsoever blazon of repair, including water leaks, is to await for the simplest respond to the problem first. In case of a leaking shower wall, it may exist something every bit simple as your shower caput is not screwed on tightly plenty and some water is leaking out the loose connectedness.
Likewise cheque your faucet handles and other simple sources. These can leak h2o if not attached correctly. Then expect for any cracks, breaks or loose screws, etc. These tin can allow water to escape and permit ti leak all over the place.
In addition to those possible sources, you should bank check your sealant or caulking. If there is a pigsty in them, and so the water has an like shooting fish in a barrel escape route. Just reseal the caulking, etc., and you lot should be expert to go.
Then if you do notice a crevice, you volition most likely demand to supersede that section of your shower wall.
How to Waterproof RV Shower Walls
The thing to recollect here is that almost all RV shower walls come waterproofed already. The plastic or fiberglass structure materials naturally resist water and practice not need whatsoever assist in that section.
Now if you own a tent trailer and so you lot might take plastic like paper on your shower walls. This plastic newspaper is not very thick and information technology may go small holes, etc., in it and allow water leak out. In this example, yous would desire to place a thicker plastic canvas over the original and seal it up good.
Or y'all may desire to remove the original plastic wall and install a ameliorate 1. The easiest gear up to exercise is to check all your seems and connections. If there are tiny holes, etc., and then seal them dorsum up with waterproof caulk or other like materials.
How to Fix Cracked RV Shower Wall
Small cracks happen in your RV shower. It may have a few years for them to appear but they do happen. The expert news is that there are some quick inexpensive fixes that will temporarily solve your problem.
The first quick set up is the most obvious. Duct tape is your friend. It seals a cleft and keeps it sealed until you tin afford to get a replacement wall or shower. Duct tape doesn't toll a lot of money and it is the perfect go to repair tool when y'all are far from domicile. It besides doesn't counterbalance a lot then y'all tin carry a few rolls with you.
The 2nd quick fix may be a bit more in price but it is said to be as effective every bit Duct tape. It is chosen eternabond and information technology is also applied like whatever tape you use normally. Once of the attractive features of this tape is that it tin endure farthermost temperatures from -20 to +150 degrees F.
To utilize either quick fix, make certain to clean your shower stall around the cracked area. You desire to remove clay, soap residue and any oily product that has gathered around the crack.
Once this is done, dry the area and and then apply some rubbing alcohol. This will make certain the surface is clean and ready for both tape types. Now cut the Duct tape to size and put it over your cleft.
For eternabond, at that place is a slightly different application process. Using strong, heavy scissors, cut the eternabond to size. Do not remove the protective liner simply yet. You will demand to knead the record so that it gets pliable and easier to use.
Once you lot have done that, peal the lining and identify the eternabond over the crack. BE Careful! This tape sticks fast and is nigh impossible to remove. In one case it the tape is in identify, apply some force per unit area but not likewise hard.
Become from the inside out when applying the pressure to brand sure the seal is in place. Allow both quick fixes set overnight earlier using your shower again.
RV Shower Wall Material
The virtually common cloth used on RV shower walls is plastic or fiberglass. These materials are very waterproof and can exist tough. It will take a lot of pressure level or force to put a crack in them.
Now some smaller RVs or tent trailers may have a paper like plastic textile roofing the walls on their showers. This material is however waterproof but information technology is not as durable every bit other materials.
Some DIY artists have taken their built in plastic walls and replaced them with some artistic materials. I went as far equally adding galvanized metal sheets . These sheets should not crack and they certainly forestall a lot of leaks and other problems
Another turned to acrylic to make their shower walls fashionable and very good looking. Acrylic is likewise tough and should piece of work well in most RV showers. They are guaranteed non to crack or fade.
A 3rd alternative textile is PVC designed to look like stone. This material and pattern adds a lot of class to the expect of your shower. It comes in i/4 inch sheets and can exist easily cut with a carpenter's pocketknife.
Then with their 30 to lx inch width, you can remove any seams. This helps cut down on water leak problems. With twenty patterns to choose from you lot can observe one that matches your taste quite easily.
The last alternative option is the solid surface panels. These are easy to install but they add together a lot of weight to your RV. They weight about 3 1/two pounds per square foot. Only y'all can cut them with good woodworking tools, so you tin do a professional job.
51 colors and 4 textures are available with this option.
Some Terminal Comments
Addressing your RV shower issues is non a difficult task in nearly cases. Replacing croaky shower walls is easy and only takes a trivial time to remove the old materials and replacing them with the new.
When you spot a leak, this could be a more hard problem to handle. Water takes the easiest path to get from bespeak A to point B. Where you come across the water coming out may not be anywhere nearly the leak origin is.
You lot may need to play a game of hide and seek to find out the problem. That means checking all the seams, connections, pipes and other water sources. When you lot are fixing loose walls, etc. Avoid using gum. You need to make sure to allow the wet escapes to avoid other water damage bug.
All RV shower wall material is waterproof. You just have to make sure the seams are sealed correctly. If y'all like existence innovative and desire to improve your shower's look, in that location are culling shower wall fabric you can apply to spruce your shower upwards.
Leaks in your RV'south shower should not be a trouble anymore.

Source: https://thecampingadvisor.com/repair-rv-shower-walls/
Posted by: scottgrosse.blogspot.com
0 Response to "How To Repair Rv Wall"
Post a Comment